Category: Blog

RSGB 2nd 70MHz Contest

2015_70MHz2_1

M0UKD/P – 70MHz

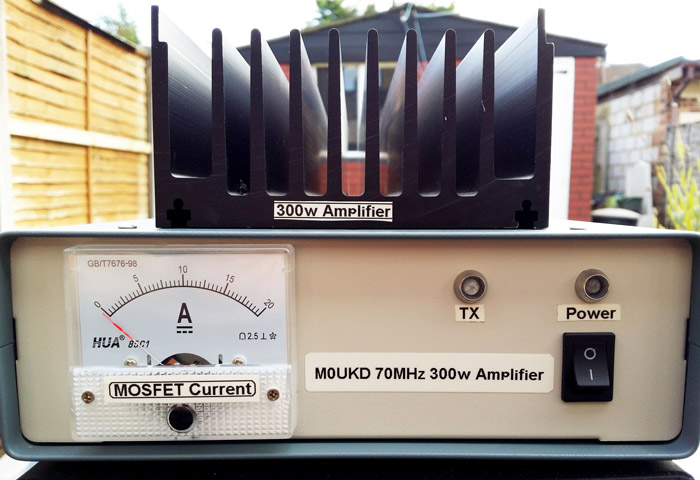
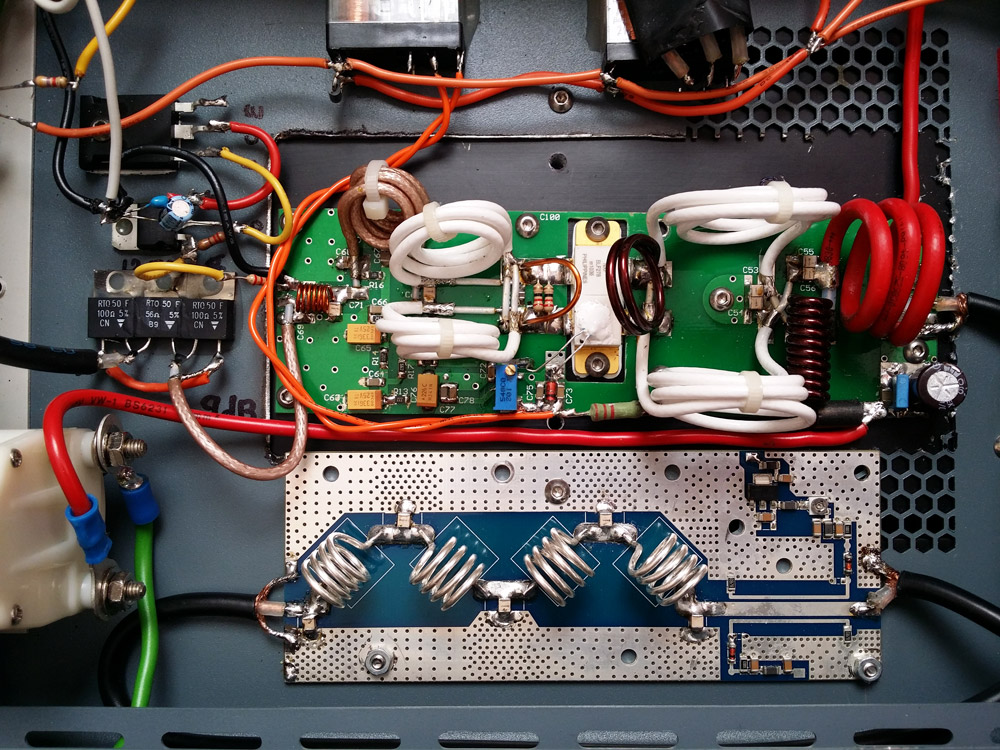
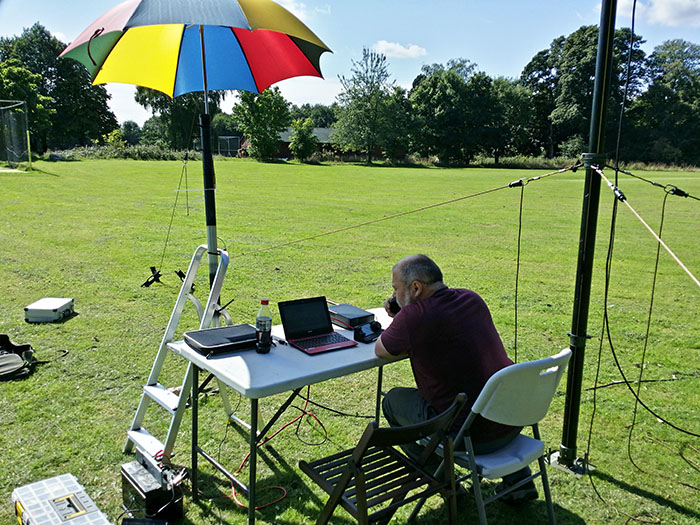
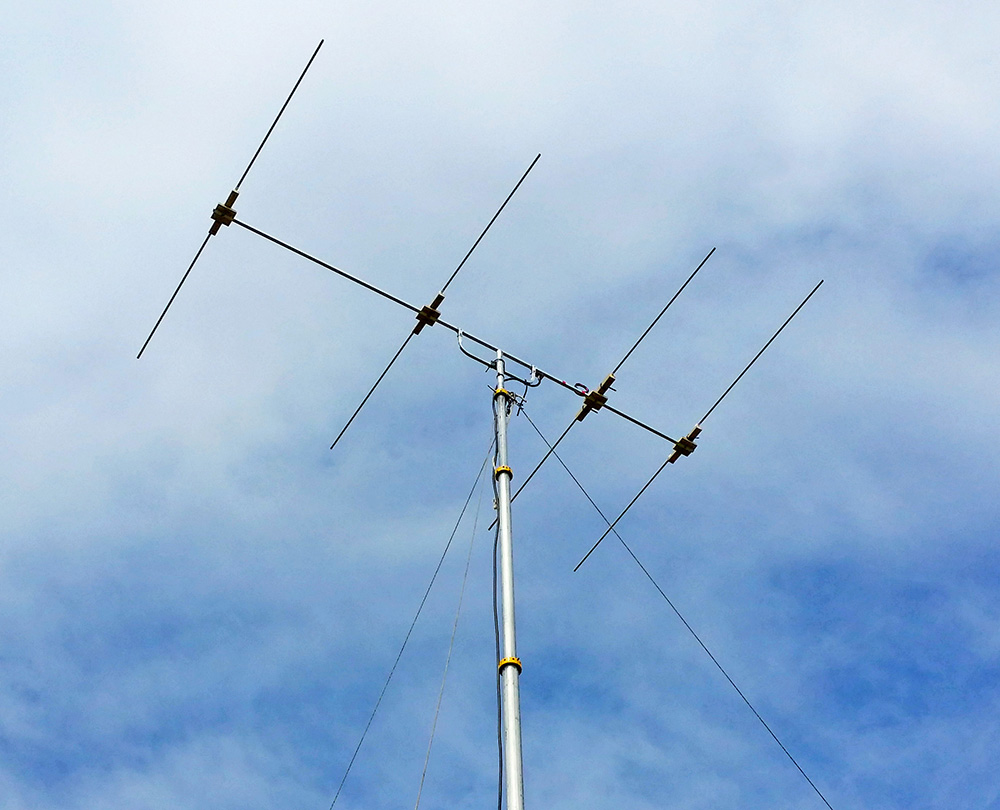
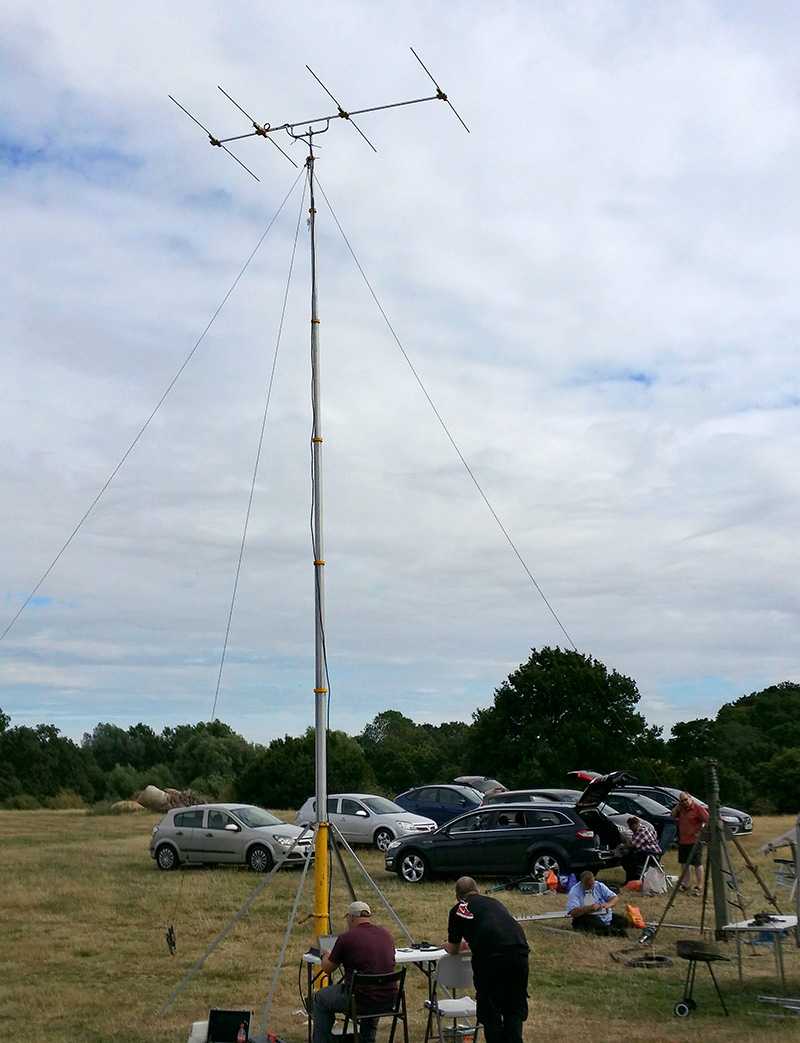
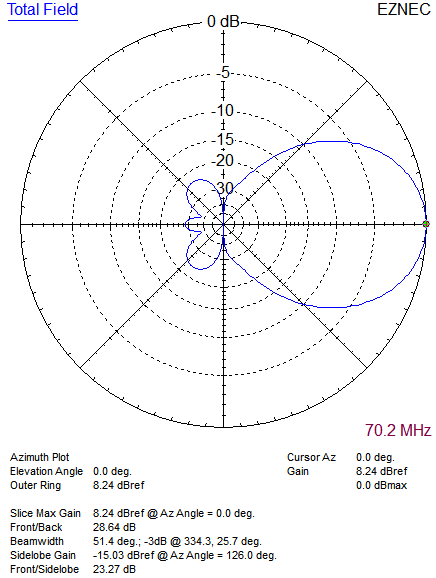
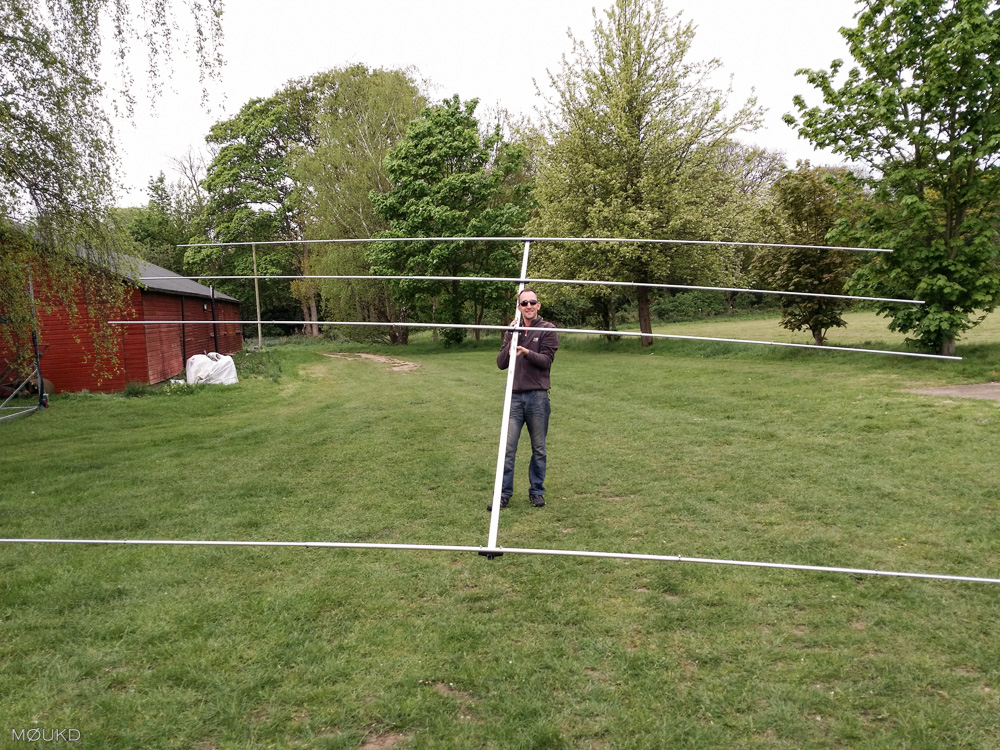
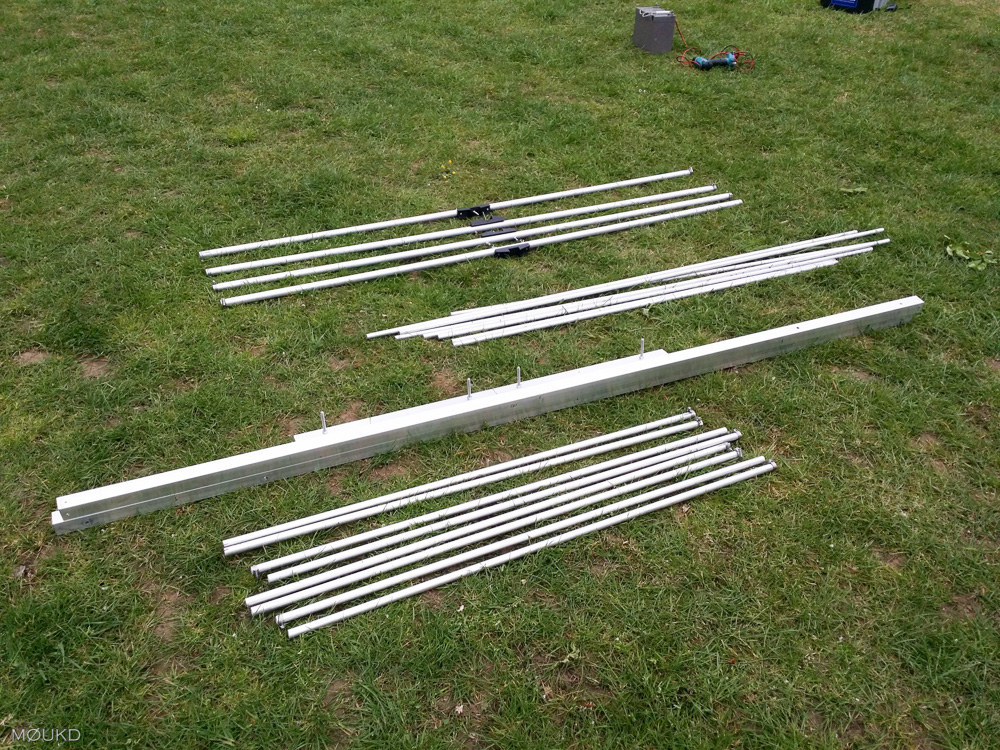
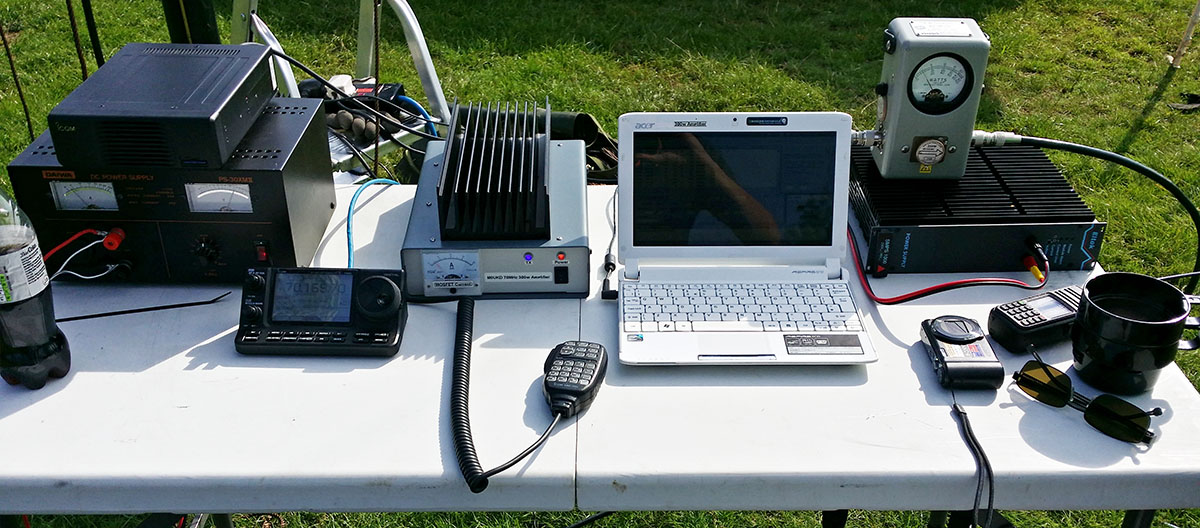
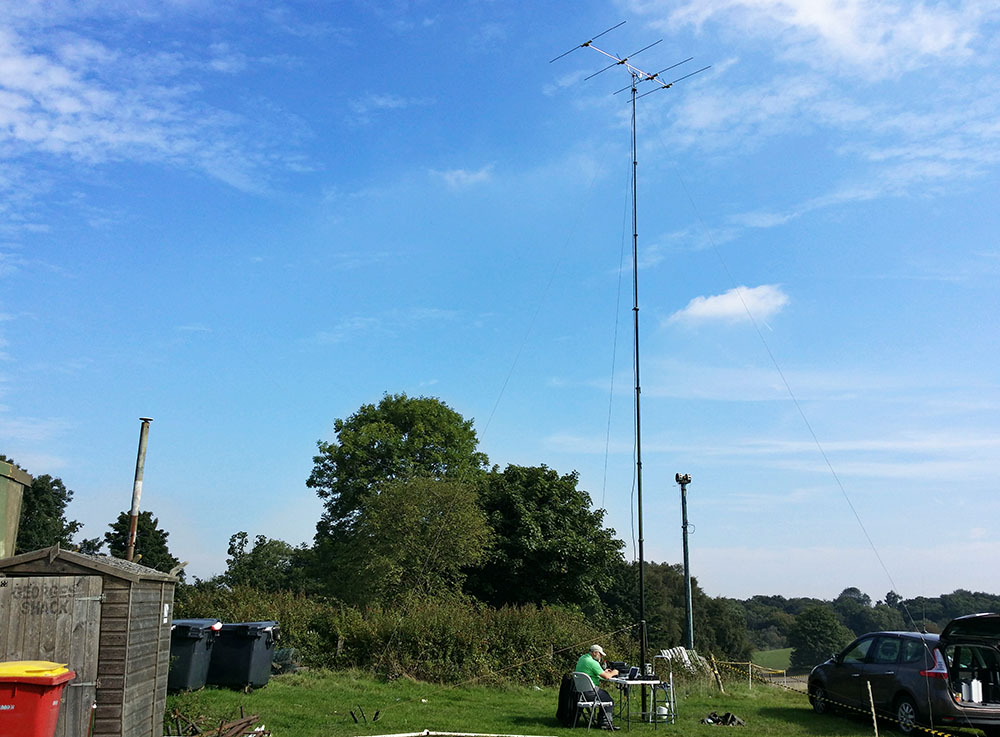
We had some great September weather today for the 2nd 70MHz contest. We setup at the Kelvedon Hatch ‘Secret Nuclear Bunker’ as seen above, using my new 70MHz amplifier at 160w and my 4 element DK7ZB 12.5Ω Yagi.
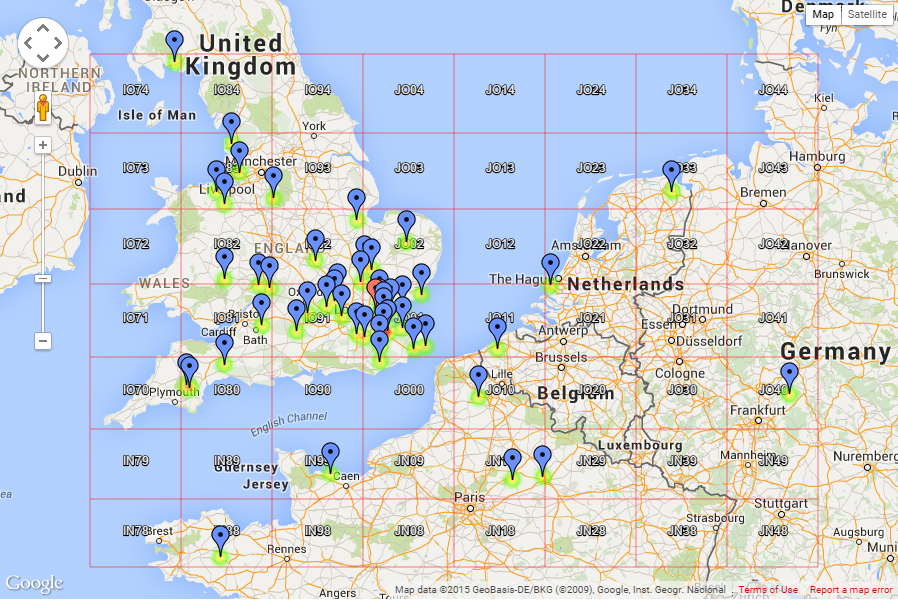
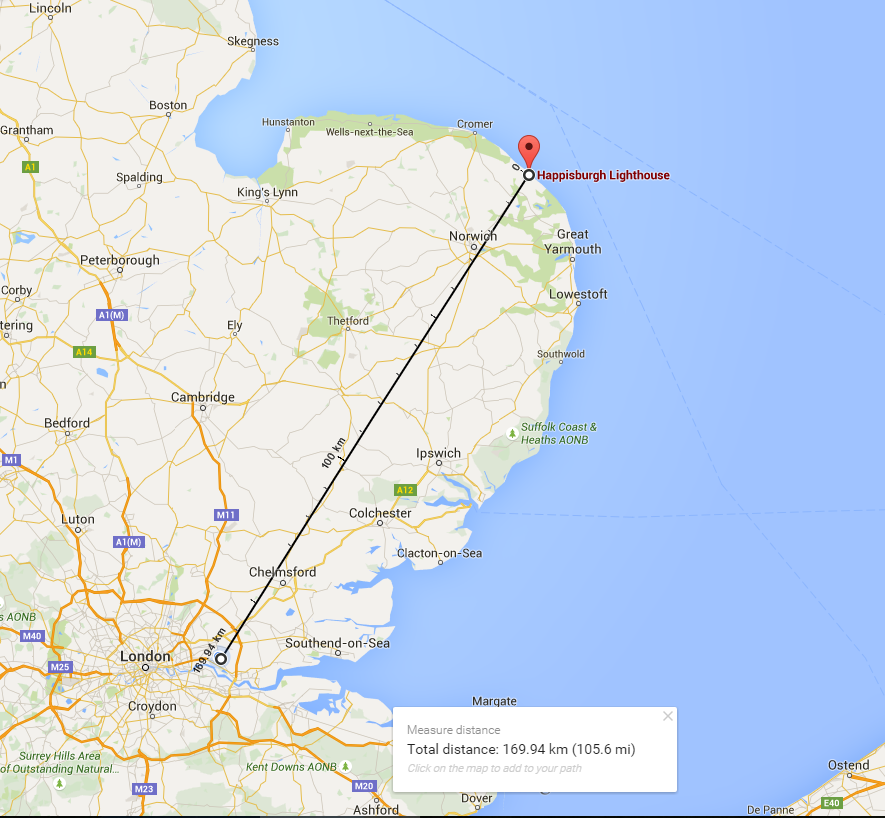
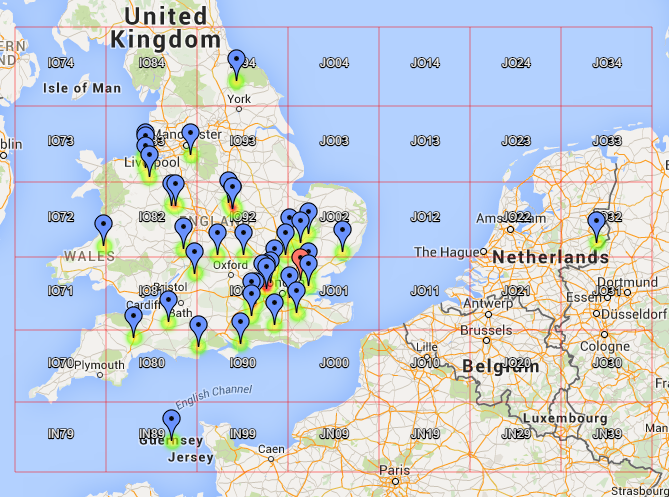
QSO Map

QSO Map

Conditions seemed quite normal, we worked no Scotland or Ireland but our best DX (as many others) was PA4VHF at 449km. Other highlights were GJ3YHU in Jersey and M1CJN/P in the North York Moors. Total contacts was 46.

A very enjoyable day of operating and testing the new amplifier. Next week, it’s the Practical Wireless 70MHz contest, so lets hope for the same weather and some band openings perhaps? Maybe I’m asking too much 🙂

The Claimed Scores are available. Thanks to Dave M0TAZ, George M1GEO, Dave M0YOL and Chris G8OCV for help & company, and of course everyone we worked (or tried to work!).

RSGB 2nd 70MHz Contest at Kelvedon Hatch

RSGB 2nd 70MHz Contest at Kelvedon Hatch

Two years in the making – 70MHz 300w Amplifier

70MHz 300w MOSFET Linear Amplifier

Today, I finished a project I started over two years ago. It’s not that it took two years to build, it’s just that its taken me two years to get the parts together and build in my spare time! The upcoming 2nd 70MHz contest and PW 70MHz contest prompted me to get this finished.

Its a 300w 70MHz amplifier, using a BLF 278 MOSFET. Power supply is 50v @ 10A. The amplifier has 9dB attenuation at the PA input to bring the gain down to something usable, as without the attenuation, 2.5w input gives 300w output (21dB gain)! The input & output power, with 9dB ATT (total 12dB gain) is:

  • 5w = 100w
  • 7.5w = 150w
  • 10w = 200w
  • 15w = 300w

The amplifier uses ~7.5a @ 48v for 200w O/P, so it’s around 80% efficient. Bias is set to 750mA. The maximum power here in the UK on 70MHz is 160w, for which this amplifier requires 8w of input. Below is a picture of the inside. I will tidy up the cables at some point!

300w PA & LPF

300w PA & LPF

Bird 43 - 70MHz 250w+

I need a larger Bird element to measure the 300w output on the Bird 43!

5th 144MHz Backpackers Contest

On Sunday, Dave and I went to South Weald to take part in the 144MHz Backpackers Contest. We used Dave’s 9 element Tonna 6m AGL and 10w from the Icom IC-7100. The weather was perfect, blue skies and sunshine and hardly a breeze! Dave worked 51 stations and some good DX for low power, due to the big stations competing in the 144MHz Trophy contest. We managed contacts with England, Wales, Scotland, France, Germany, Belgium and The Netherlands. Our best DX was DR4X at 648 KM. The QSO map can be seen below.

5th Backpackers 2015 QSO map

5th Backpackers 2015 QSO map

I brought along some 70MHz equipment, which I set up after packing away the 144MHz gear and spent about an hour on 4m working 8 stations. All in all, a good days operating in the sun!

Backpackers in the September sunshine!

Backpackers in the September sunshine!

Working Happisburgh Lighthouse on 70MHz

Selim M0XTA went to Happisburgh Lighthouse for the Lighthouse On The Air weekend 2015. He set up a 70MHz station on top of the lighthouse, using a ⅝ λ vertical. I had a listen from home and could just make out a signal in the local noise I get on 4m at home, so I decided to go out portable and give it a try.

The 70MHz slim jim on 10m pole

The 70MHz slim jim on 10m pole

I set up a slim jim made from 450Ω feeder on a 10 metre fibreglass pole on a small local hill (away from the QRM) and used the Anytone AT588 with 50w on FM. There was some slow QSB, but we made the contact. He was 105 miles from me (see map). Not bad for no beams and FM!

Happisburgh Lighthouse Distance Map

Happisburgh Lighthouse Distance Map

I took a tiny bit of video on my phone, which is below.

70MHz Cumulatives – 9th August 2015

Some amateur friends (that sounds odd, but you know what I mean!) were playing radio this weekend from the Kelvedon Hatch Secret Nuclear Bunker in Essex. I decided on Saturday to build a 70MHz Yagi and have a go in the 70MHz Cumulatives contest. I had some spare aluminium and wanted an antenna with good performance that wasn’t too bulky and therefore easy for portable operation. I decided to build a DK7ZB design as I have had great success with them in the past.

70MHz 4 element 12.5ohm DK7ZB Yagi

70MHz 4 element 12.5ohm DK7ZB Yagi

I decided on Version 1 on this page. Its a 12.5Ω design and has around 8.24dBd gain. The gain vs size is excellent, matching Yagi’s almost twice the length, except this one I can fit in the car. The compromise is the narrow bandwidth, and therefore tolerances were very small and build was rather critical. I adjusted the antenna slightly in EZNEC to suit my ½” tube. First tests with the antenna showed that it was a perfect 1.0:1 SWR at 69.5MHz and 1.7:1 at 70.2MHz. I trimmed 10mm off each element and that got it spot on 70.2MHz. We did well in the contest and a QSO map is available. We worked 40 stations in 2 hours, which I think is good for 70MHz. Our best DX was PA4VHF at 449km.

70MHz Cumulatives QSO map

70MHz Cumulatives QSO map

Thanks to George M1GEO for allowing me to use the site and Dave M0TAZ for the use of his mast!

70MHz DK7ZB Yagi on mast

70MHz DK7ZB Yagi on mast

70MHz 4ele 12.5ohm DK7ZB pattern

70MHz 4ele 12.5ohm DK7ZB pattern

Baofeng CH-3+ Desktop Charger

UV-3R+ and Charger

I recently bought a Baofeng UV-3R+ 2m/70cm handheld. I always said I would never buy a Baofeng, but I wanted something cheap that I could throw about at work and not worry about. Anyway, we all know that you get what you pay for in life. It comes with a desktop charger, which had a problem. It has a USB cable and a small DC jack which plugs into the base itself. When I first plugged the DC plug in, it felt weird. It did work, but you had to fiddle with the plug to get it to make a connection. What happened is it had pushed the centre pin of the small DC socket backwards, because it must have not been central in the socket.

UV-3R Charger DC pin bent back

UV-3R Charger DC pin bent back

To fix it, I decided to drill a small hole above the socket, just big enough for the cable, cut the DC plug off and solder the wires direct to the PCB.

UV-3R+ Desktop Charger - Fixed!

UV-3R+ Desktop Charger – Fixed!

Fixed, no connection problems now!

Building a 4 element 15m monoband Yagi with M0TAZ

Hmm, what to do on a bank holiday Monday? Well, we decided to purchase the aluminium to build a 15m and 10m Yagi about 6 months ago, so it was time to make something of it. Dave M0TAZ is building a 4 element 15m Yagi, and I am building a 3 element 10m Yagi. Dave started constructing his 15m beam this week. It is a DK7ZB 28Ω feed-point 4 element Yagi, with a forward gain of ~6.4dBd. The elements are tapered with 3 different sizes of tubing and the boom is 40mm square and 5m long. All that’s needed now is the feed-point arrangement and it’s ready for testing! Still, it looks great and is very rigid. Cant wait to get it on the mast! Here are a few photos for now…

The 15m Monoband Yagi

The 15m Monoband Yagi

The 15m Yagi - Disassembled.

The 15m Yagi – Disassembled. About £100 worth of aluminium!

(more…)